In this lesson, I am going to show you how to draw a piranha. Well, one way to do it anyway… 😉 As I’ve stated before, one of my favourite things about drawing, is the fact that you have pretty much total freedom in what you do. The only limitations come from your own imagination and abilities. And both of these will grow and expand as you work and practice. (I would argue that this in itself is actually reason enough to start drawing! But that’s a topic for another day! 😉 )
A grain of Realism
Obviously when you’re drawing in a cartoon style, like I do most of the time, you have a greater amount of freedom in how you approach your drawing, than you would if you were to go for realism. But no matter which way you do it though, there has to be a certain amount of realism/accuracy in your drawing for you to be able to claim that you’re drawing something specific. In this case, looking at how to draw a piranha, I can’t just draw any old fish, and call it a piranha, just cause I feel like it… 😉
Enter the Google Search
So to start out, I do a quick google search, and look at some pictures of piranhas. I look at their fins, their general body shape, their colors etc. and then I base my drawing loosely on those observations. I can distort the features as much as I like, but some of the basics still have to be there. You can compare it to those people you often find in tourist areas drawing comic portraits. They take the features of their subject; distort them, and blow them out of proportion to give them a comic look, but you still have to be able to recognize the subject, otherwise it’s just a random drawing of somebody with a big nose and floppy ears…
Now whether I actually succeeded in capturing the features of a piranha, is obviously a matter of opinion. I’ll let you decide for yourself, but here are the steps that I took to get there. My take on how to draw a piranha:
Video first. Written steps down below!
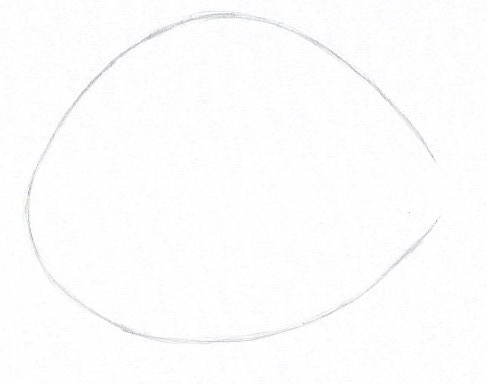
Step One
The basic shape of the body.
Remember to draw very lightly in the beginning. Just take it slow, and find the shape you like. And don’t be afraid to erase and start over, if you feel like it. A good starting point makes everything after a lot easier!
Step Two
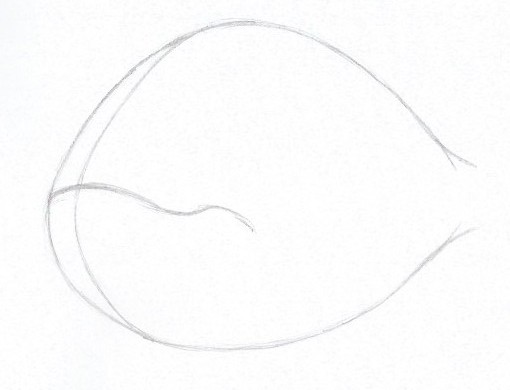
Adding on to the basic shape from step one:
1: A guideline from top to bottom. I want to draw my piranha viewed from the front and side. Drawing a line like this, helps me to identify the middle of the body. Guidelines are immensely helpful in keeping the right perspective, which is super important in order to get a 3D feel of your drawing.
2: The basic shape of the mouth. Using the guideline from before, I can place the mouth, so that the top of the curve is right on the mid line of my fish.
3: The beginning of the tale. Coming of the back end of the body.
Step Three
Adding some fins.
Again I’m starting with the basic shapes, details will come later.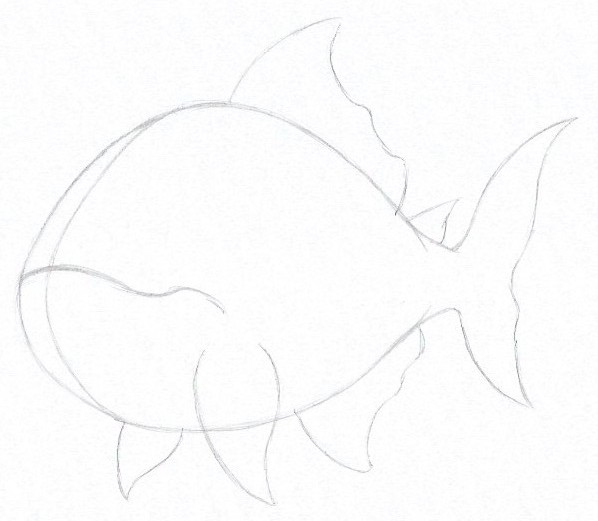
Step Four
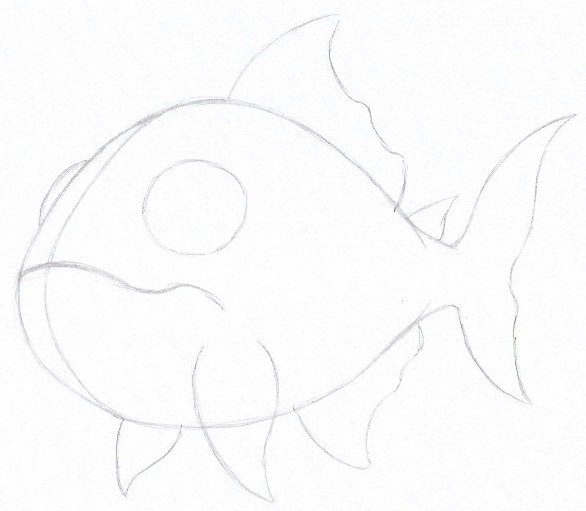
The last two fins. The pectoral fins.
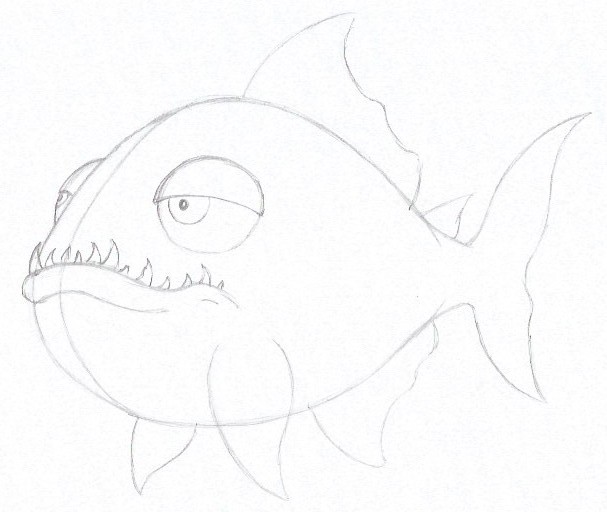
Also, the basic shape of the eyes. Here I am also very much using the guideline, that separates the body in half. This allows me to place the far eye in the right place, to get a convincing 3D effect.
Step Five
The first few details.
Lower Lip, teeth, eyelids, pupils.
Notice the direction of the curving of the teeth. This also underlines the 3D effect. Very often you will find that seemingly small details make a huge difference. (As an experiment, you could try to draw the teeth all curving the same direction, and see what that looks like. I think you might be surprised! 😉 )
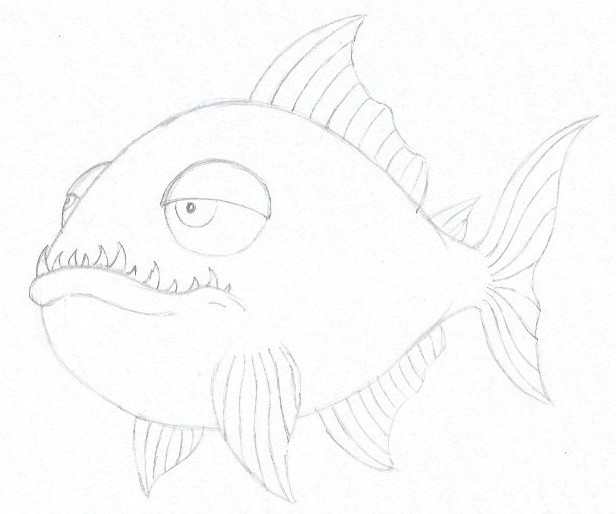
Step Six
Erasing some of the guidelines, and adding structural lines in the fins.
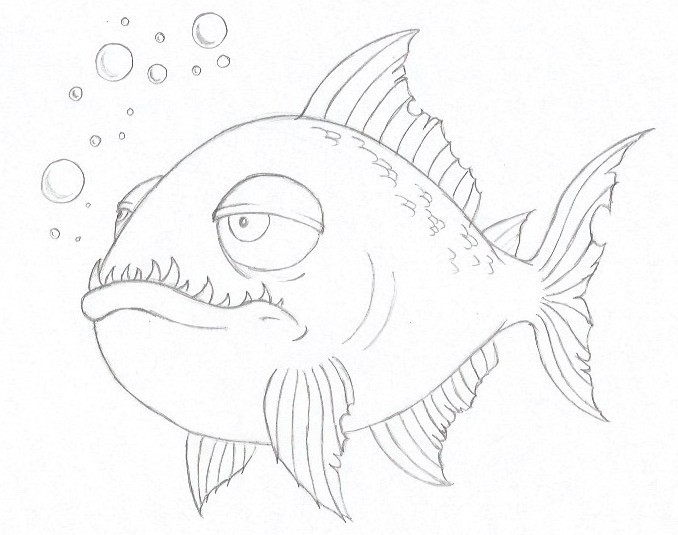
Step Seven
More details.
On the fins, I am adding some cuts and irregularities. This gives him some battle scars, and some personality.
Also, gills, lines under the eyes, and some scales.
Finally, I drew a few bubbles just to give the illusion of being under water. (notice the shading of the bubbles. I just saw that on another drawing, and picked it up. 😉 I think it works quite well… )
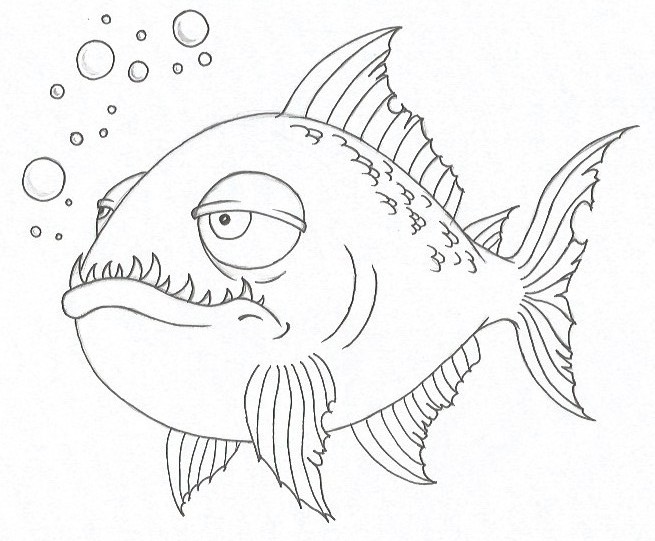
Step Eight
Outlining in ink. I used a fine liner for this.
Step Nine
Shading.
Again, done with a fine liner, and using basic crosshatching. I am trying to keep the lines going with the shape of the fish, to underline the 3D effect.
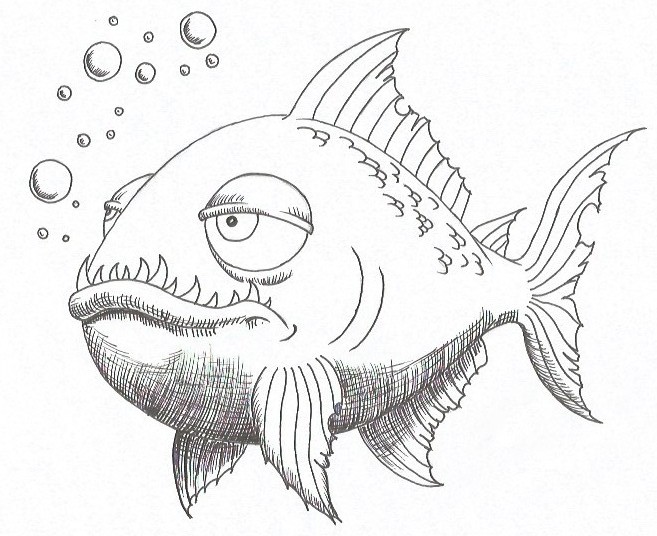
Step Nine
Colouring!
I used two shades of blue, a Grey, a red and an orange. And then I used a white posca for some highlights along the back and fins.
If you look closely, it’s fairly easy to see where the different colours go. The challenging part is making them blend into each other relatively smoothly.
(One thing I did, which I’ll definitely recommend, is that I took a photocopy of my drawing, and experimented a bit on that, before starting out on my original. This allowed for some highly needed practice! 😉 I still managed to go quite a bit overboard with the orange and reds on the belly of my fish. This was supposed to be a lot more subtle. But that’s the learning process, right?!? )
Now, on a general note, colouring is a huge area all by itself, and I will be adding some lessons around this subject, as I learn some more. (Consider, for instance, the fact that for comic books you often have separate artists doing only the coloring. This says something about the magnitude and difficulty of it!)
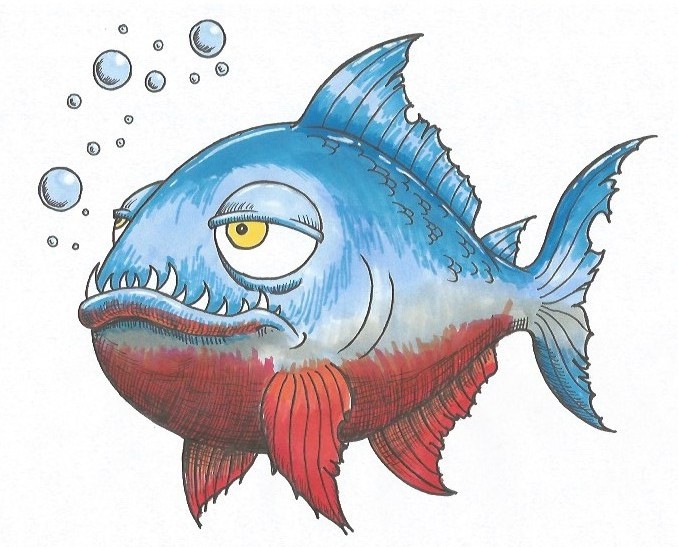
And here we are, at the end. This is my take on how to draw a piranha. I hope this made sense to you, and that you learned something from it. If you try it out, I’d love to see the result, or just hear a bit about your experience with the lesson. So please comment below, I’d love to hear from you!
And remember: Drawing is s skill – let’s learn it!
Best wishes,
Michael
That was such a great tutorial. Thanks so much.
The steps were easy to follow, and the drawing came out really well. I’m surprised that I can actually draw… 😉
Thanks again, I’ll be coming back for more.
Kristina
Hi Kristina.
Thanks so much for the kind words. I’m happy that you were able to follow the instructions, and that your result came out well… Yes, everyone can draw, it’s a skill, like anything else, and hat’s what were trying to learn here at the drawing journey. So yes please. Do come back! 🙂
Thanks for the visit, and thanks for the comment.
Best wijsjes,
Michael
Thank you for your article! It’s fantastic that nowadays we don’t need to leave our home to learn something but are offered good tutorials – like yours – online. I’m glad to hear that you’ll also add some lessons on colouring! I’m generally amazed by the great variety of colours, of course having my favourite ones! By the way do you think that anybody can learn drawing? Or special skills are needed? Thank you again for your post!
Hi Agnes.
Yes, it truly is amazing how much we’re able to learn with just simple online search. Literally anything is available, right?!?
And yes, I’ll be adding some lessons on colouring, but like I mentioned it’s a big subject in itself, and ultimately it comes down to ones own preference, like yours.
There is of course some theory about how colours blend, how they work together and such, but experimenting is always good. That’s what I do a lot of the time… 🙂
And to answer your question: YES! I absolutely believe that anybody can learn how to draw! This is one of the basic preferences of my site. Drawing is skill… Teachable and learnable. Not a magic ability, that the chosen few have been bestowed… 😉
Thanks for your visit, and thanks for your comment.
Best wishes,
Michael
Holy cow! You are an amazing artist! I love drawing in my free time and definitely prefer to draw cartoon style images. My favorite subject is characters from Disney movies.
I really like the way that you had the article laid out. It was broken down nicely, the steps were easy to follow, and there were pictures to go with it. What a perfect way to teach someone how to draw something! I am definitely going to have to try drawing this!
Best wishes,
Colleen
Hi Colleen.
Thank you so much for the kind words! Drawing really is a fantastic passtime! Haven’t tried my hand at Disney characters myself yet… I might have to rectify that soon! 😉
Super happy that you found the instructions helpful and easy to follow. That’s my biggest concern in creating these tutorials. It’s so hard to know what makes sense to other people!
If you do give the piranha a try, I’d love to see the result!
Thanks for the visit, and thanks for the comment.
Best wishes,
Michael
What I love about your site is you make it look so easy, and then when I follow your instructions, it actually is easy! It’s awesome that I can draw like a pro from your directions.
Thank you so much. It’s so much fun, and my daughter, who loves to draw, has found great value from your site!
Hi Babs.
Thank you so much for that! That means a lot to me.
One of the hardest things about doing these tutorials is trying to figure out what makes sense to others, which is not always the same as what makes sense to me… 😉
So knowing that you and your daughter find them understandable and easy to follow is great to hear. Also because (as you may know or may not know) one of the basic premises of my site, is that drawing is a learnable and teachable skill.
If you have any wishes, or suggestions to subjects or specifik things you or your daughter would like to learn about, please let me know, and I will do my best to grant your wish! 😉
Thanks so much for the visit, and thanks for the comment.
Best wishes,
Michael
Hi Michael,
You did an awesome job on this tutorial explaining all the steps for drawing a piranha. I actually followed your steps be and Drew one too! ?
For someone who isn’t a talented drawer, I did pretty good by your instructions. ?
I’m at work right now, do I’ll have to color him later.
My grand daughter loves to draw and I’m sure this will interest her as well. Do you recommend a certain kind of paper, or art pencils for this type of art?
Thanks for sharing! I’ll bookmark your site so I can share it with my grand daughter when she visits.
Best wishes,
Devara
Hi Devara.
Thanks so much for the kind words. I’m happy that you were able to follow the steps, and got a good result out of it! One of the hardest things about these tutorials is knowing what makes sense to others… 😉
And by all means show this to your granddaughter, if you think she would enjoy it. 🙂
As far as paper goes, anything works, really! I actually often recommend starting out with some cheap copy paper, as you can go through a lot of sheets practicing, without worrying about cost. Also because I believe it’s super important to not be afraid of making mistakes in the beginning, If you’re too worried about every little line you put on paper, development will be slow, whereas if you boldly throw yourself into it, you can make some great progress quite rapidly!
As you develop, you might want to look into some better quality paper. Especially if you’re going to do a lot of colouring. The paper can make a pretty big difference in how the colours come out. But don’t worry about it too much, at first… Just start drawing! 😉
Same thing with pencils. Anything works, really! Having a softer lead like a “B” or a “HB” makes a darker line, which I personally like a lot. I’m also a big fan of mechanical pencils myself, but mainly because you don’t have to sharpen them… 😉 If you do decide on a mechanical pencil, don’t go for too thin a point. Often times you will find mainly 0,05 thickness in most stores, but 0,07 or 0,09 is actually a better place to start… Hope all that helps! 🙂
Best wishes, thanks for visiting, and thanks for the comment!
Michael
Thanks for the fast response! I wasn’t aware that different paper could make colors appear differently, but I guess it makes sense.
I appreciate you taking the time to break things down for me. I’ll have to get some pencils and start playing around. My dad is an artist, but I’ve never been into it. However, I did take an art class in 5th or 6th grade and drew a very large ET character. I was pretty proud of it!
Maybe you could have a way for people to submit their artwork to you that they done per your instructions and you could post some of them on your site. That would increase interaction and people might would get excited to see their drawings online, especially kids! Just a thought!
I look forward to practicing some more soon! Thanks again!
Best wishes,
Devara
Hi again Devara.
Yeah, paper can make a pretty big difference in how the colours appear. I didn’t actually realize that myself, until I tried it out… 😉
Live and learn, right?
And I’m happy to help, please if you have any more questions, just let me know, and I’ll do my best to answer them.
And thanks for the great suggestion about posting peoples drawings! I actually thought about that as well, a while back, but kinda forgot about it again. I think I’ll definitely have to look into making that a reality! A great way of interacting with people, and also people inspiring and helping each other out… That would be such a cool thing to have happen! 🙂
Thanks again for the kind words, the comments, and not least for the great suggestion!
All the best,
Michael
I’m glad you like my suggestion and had already thought about it! I think it would definitely inspire more people to participate.
I look forward to seeing what you come up with..
Best of luck!
Devara
It’s definitely a great suggestion… And well, to be precise, the thought crossed my mind… The actual idea hadn’t actually formed yet… 😉
But I’ll try to see what makes most sense. Perhaps on the individual posts? Perhaps on a page by itself? We’ll see.
Thanks again, for the great thoughts! I really appreciate it!
All the best,
Michael