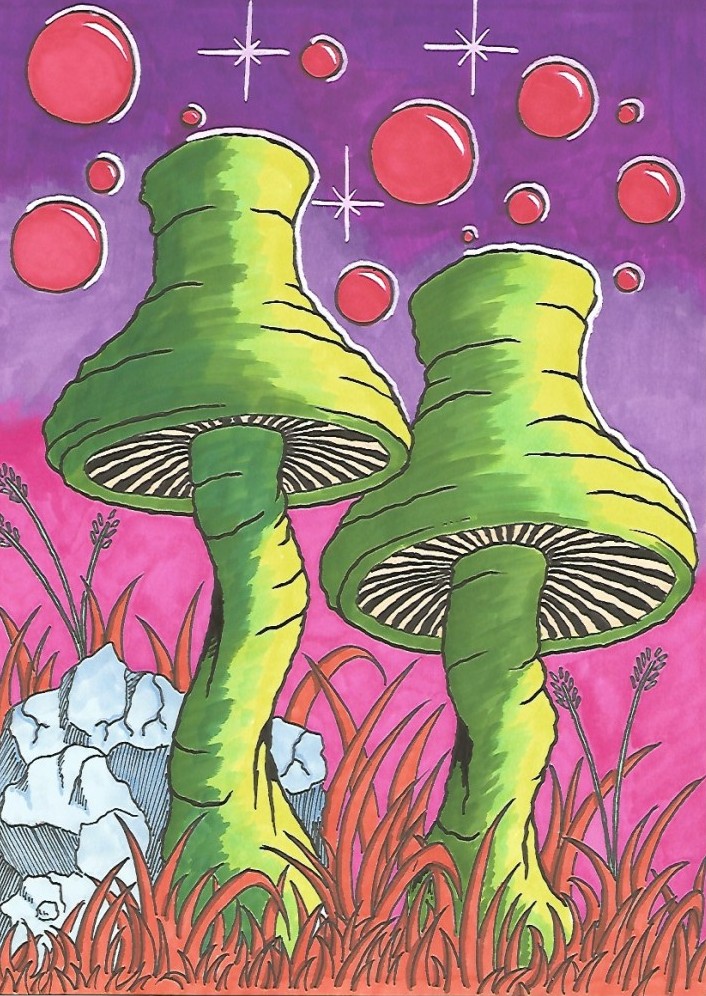
So I did this drawing. It features two mushrooms in what I thought looked kinda like a space environment, so I called it Space Fungus. Not the most incredible name, but there it is… 😉
As I was just finishing up the initial sketch, I got the idea to document and share some of the steps along the way. Firstly for my own sake, because it is super beneficial to look at ones own work from a more elevated perspective, so to speak. And also because in a year or so, when I have (hopefully) developed as an artist, it might be interesting to see the choices I make at this point in time. And finally I thought it might possibly interest somebody else as well… So if you, reading this, find it the slightest bit interesting, or helpful, or anything else, that’s great! And if you should feel so inclined, I’d love to hear from you. 🙂
So… What you’re looking at here, is not a tutorial. It’s just a bit of an insight into the process towards one of my finished drawings.
My Own Worst Critic!
Yes, I am! Just like so many others, I really struggle with focusing on the good aspects in the drawings that I do. I always see primarily the faults and the shortcomings. So I deliberately try to practice changing my perspective. While I do think it’s super important to allow yourself to be a bad artist, in order to improve (I have written a post in which I talk more about this HERE ), constant criticism isn’t the way to go either… And self criticism, as so many other habits, is something that can be changed with deliberate thought and effort. The goal, as I see it, is to reach a point where the inevitable self criticism is of the good kind, the kind that urges me to improve and become better. Not the kind that cripples my progress.
And for this to be possible, I have to see SOMETHING good in what I do, or else what’s the point?!? If I ONLY see the faults and the shortcomings, I will have absolutely no drive to improve, because there will be no belief in my own ability to improve, and as an artist in general.
Now having said all that, I actually think this drawing turned out decent. I like the basic pencil sketch, and I also like the colouring scheme. I definitely also see lots of areas with room for improvement, and things I would do differently, but that’s alright! As I say: Drawing is a skill, and a skill can be improved through practice, so that’s what I’ll do!
The Process
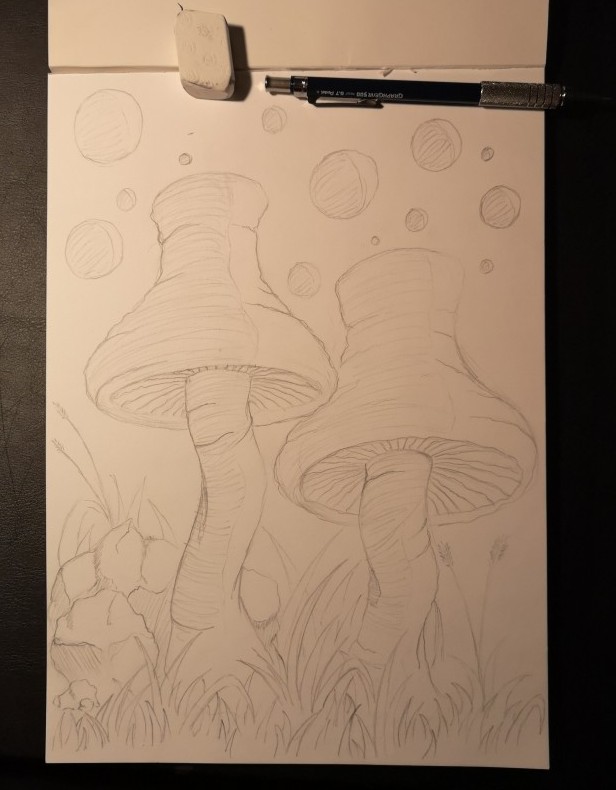
As most drawings I do, this started with a pencil sketch.
The initial idea was the two mushrooms. And then I gradually added different items to the background: Some rocks, grass and then the floating bubbles in the end.
Interesting side note: As you might be able to tell: the shading on the mushrooms, and the bubbles, is different from the cross hatching I usually do. In this case, the shaded area is clearly defined with a line, and then the shading is applied. I’ve seen this type of shading used in a couple of different places, and I really like it. It has a very graphic and stylistic look to it, that I enjoy. I ended up going a different route when I coloured the drawing, because I wasn’t sufficiently confident in this way of doing it, but this is something that I want to learn at a later point.
This first picture, is taken with my phone camera. This also features one of my trusty pencils, and my eraser. I use primarily mechanical pencils. This one is a Pentel Graphgear 0,7, which is a really nice pencil. And of course my go-to eraser: the classic Staedtler Mars Plastic. (I always cut the ends in a diagonal shape to get some sharp edges, and as it gets worn down, I cut a bit more… )
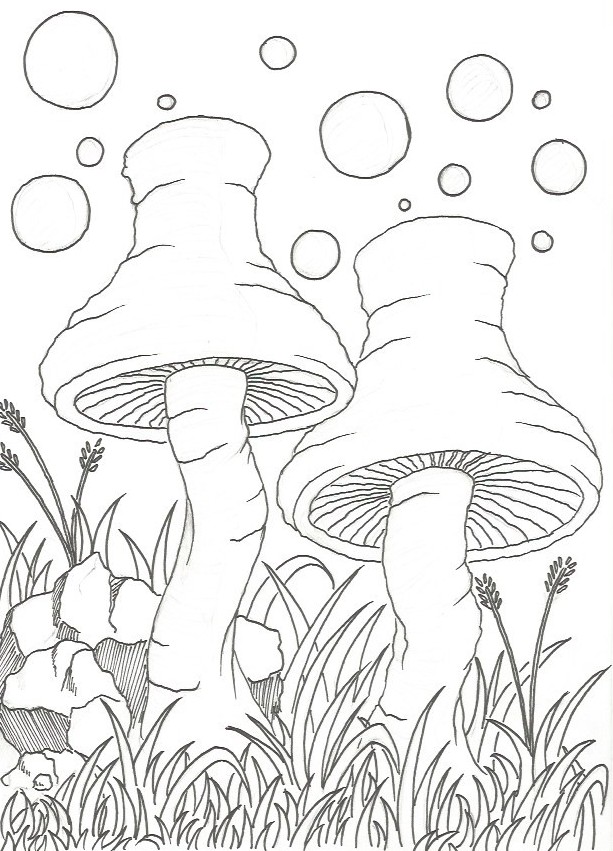
After the sketch I did an outline in ink. I also started doing some shading on the rocks, but decided to do the rest of my shading with the colours instead. So this ink drawing obviously looks a little empty.
This was done with a Staedtler fineliner 0.5 mm
The Colouring
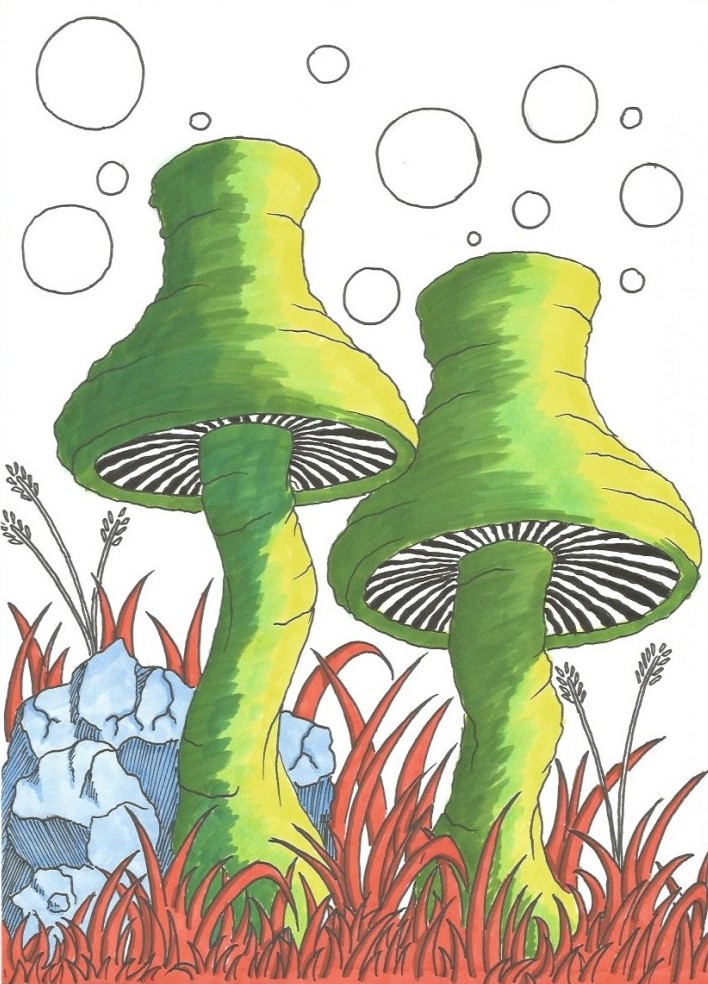
For the actual mushrooms I’ve used three different colours of green. I did a layer with a light almost fluorescent green, and then I did the first layer of shading with a slightly darker one, and at the end I did my final shading with a very dark one.
And of course orange grass (with a brown shading), and blue rocks… Because why the hell not?!? 😉
This is all done in markers. I like alcohol based markers, as they blend really nicely. The ones I’ve used here, are some relatively cheap Chinese ones that I actually bought in my local supermarket, I find them pretty decent, but there’s definitely better ones out there. The best (and most expensive) ones I’ve tried are Copic Markers. I only have a few of those as they’re quite costly, but I think they’re definitely worth the price tag, so I will be getting more! It’s one of those “build your stash slowly” items. 😉
Background
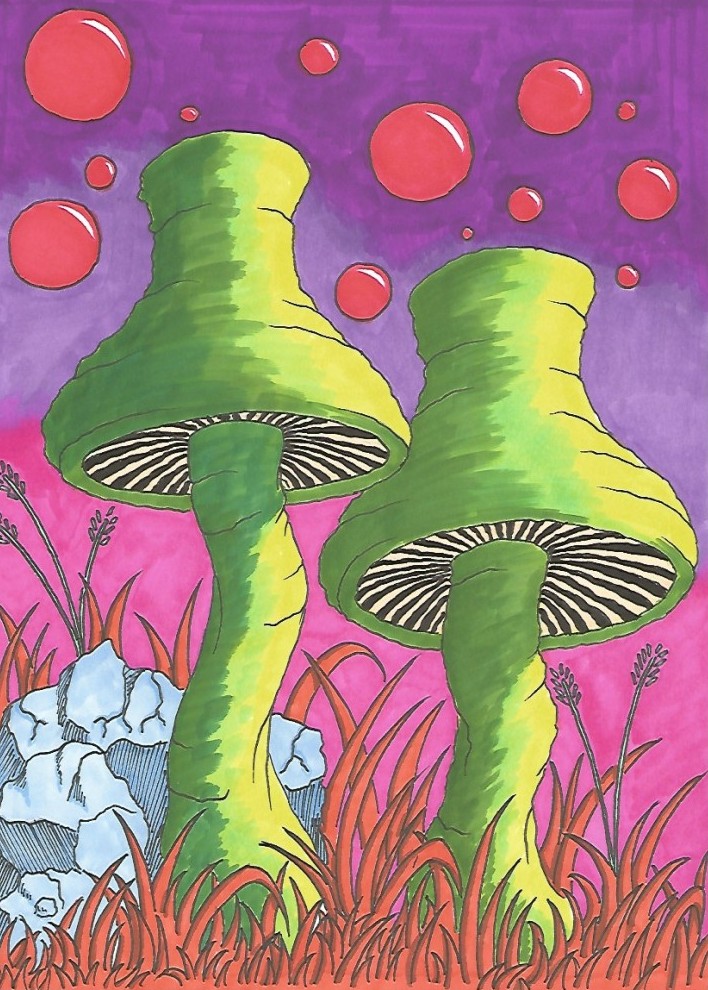
Pink, and two shades of purple make up the horizon. And then Red for the bubbles, with a white reflection. Sometimes I’ve drawn these reflections with a white Posca marker, but in this case, I just left out colouring. I haven’t really decided which method I prefer. I guess more field research is required… 😉
Highlights
As a final touch, I did an extra outline with a black pencil brush pen in a few places. I also did some more shading, which, looking back, wasn’t such a great idea, since the lines are too thick, so the shading is a bit too massive. I also used the white Posca marker I mentioned earlier, to do some stars and some highlights. These also didn’t turn out as well as I had hoped, but I think the idea could work with more skill and better execution.
To summarize:
So, my own personal thoughts regarding this piece are as follows:
I like the basic idea of the drawing, and I think the initial sketch turned out pretty good. I also like the overall colourscheme, and I think the colours generally complement each other reasonably well. I could definitely have done a better job with the final touches, like the outline and the white highlights, but I think the ideas would have worked well, if I had been better at doing them.
All in all I’m pretty happy with how the whole thing turned out. But there are definitely plenty of areas, where I would have liked to see a better result.
So… some success, and lots of room for improvement! Which makes it a great learning opportunity, and a perfect example of a typical step on my personal Drawing Journey. 🙂
As always, I’d love to hear your thoughts around it. So leave me a comment below.
And If you decide to try your hand at this motif, I’d love to see it! You can drop me a mail, if you’re not comfortable posting it publicly.
As always, keep drawing keep practicing, and remember that drawing is a skill – so let’s learn it!
All the best,
Michael
WOW, I am so impressed. I had to bookmark and send the link to my daughter. She absolutely loves drawing and her style is so similar to yours. She is going to be blown away with all the information on your site.
You definitely have a great skill. Keep it up. I look forward to the next post.
Hi Kay.
Wow yourself! Thank you so much for the kind words. 🙂
By all means send it to your daughter. I love to help kids improve their drawing skills (I have a 6 year old daughter myself. ;))
But don’t shy away from giving it a shot yourself, even though you are an adult. Drawing is so much fun, has numerous benefits, and is a great stress reliever as well…
Thanks again for the kind words, and thanks for the visit, and the comment.
Best wishes,
Michael