Hello there good people, and welcome to another tutorial here on the Drawing Journey. This time I’ll show you how to draw an anchor step by step. The anchor, of course, is a much loved and traditional motif representing strength and stability in a sea of turmoil. Something I think we can all agree is a much needed and welcomed notion in these times of unrest in our otherwise beautiful world.
At the end of this tutorial you will have the skills to draw a basic anchor, you will know all the steps to get there, but remember you are most welcome – and indeed encouraged – to make it your own, to vary shapes, sizes and colours. When you draw you create your own world and you can do whatever you wish. You can literally mold reality to your own will! So feel free to experiment. To help you out, I have added a handful of different anchors at the end of this post, all drawn using the same steps as I am going to teach you in this tutorial, just varying small parts along the way to create different versions. So feel free to draw as much or as little inspiration from these as you see fit. But of course, as with anything else, it is always the easiest to improvise when the basics are (at least somewhat) covered. So start out going through the steps of this tutorial as I have shown them below.
Don’t overcomplicate it, just take it step by step, and remember to take your time, and be patient with yourself. As with anything worth doing, drawing takes practice! So for instance, don’t be afraid to draw the same thing several times, and feel how doing this makes the process easier, and feel (I do the same thing. Before making this post I probably drew a good 15-20 anchors… 😉 As I have said many times drawing is a skill that can be learned and practiced.
The materials I use:
As far as materials go, I would recommend a pencil – preferably a soft one – for your initial sketching and then a fineliner of sorts for your outlining.
Personally I like to use a mechanical pencil, (but that is simply habit. A regular old pencil of any type will do just fine! :). I really like Pentel’s mechanical pencils. I use the one called Graphgear 500 0.5 mm, and sometimes the Pentel P205 0.5 mm. For fineliners, I like the UniPin fineliners, and again I usually go with the 0.5 mm. And for paper I usually draw on just regular old copy paper.
So if you want my recommendations there you go. But remember that you can use anything you want, and also there are so many types of drawing tools, so go ahead and do some experimenting to find out what YOU like!
Quick note about line thickness!
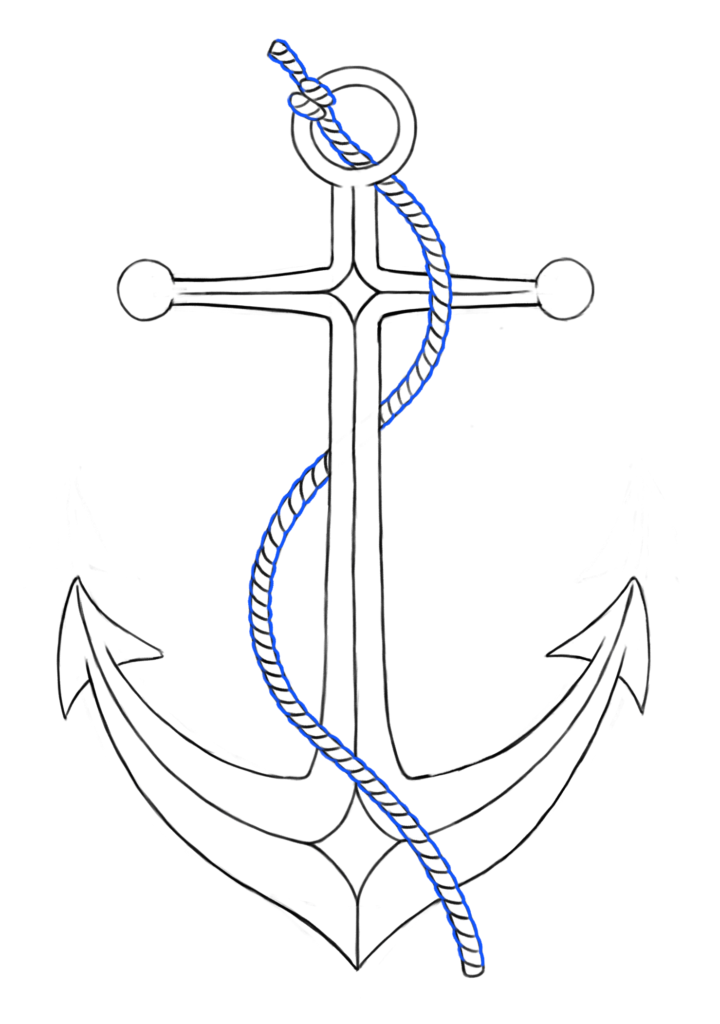
In order to get the steps of this tutorial to be nice and clear, I have drawn them a lot firmer than I normally would. In the beginning when drawing guidelines and sketching, you should draw really looseley and lightly. A lot of the guidelines and sketching will be erased further down the line, so if you draw with a very firm hand it will leave marks on your paper! (Also the blue color is just to show you which lines are the ones being drawn in that particular step. 😉
Alright, enough yapping from me! Let’s get to drawing!
Step 1
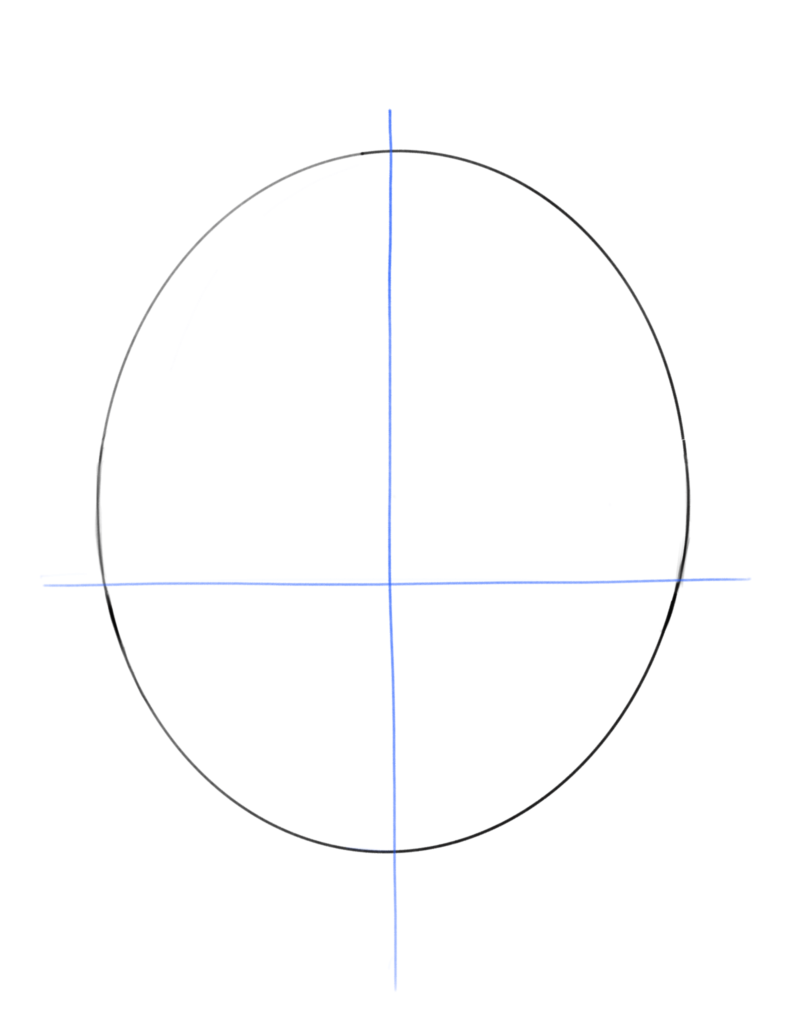
I am a big fan of guidelines, so for this drawing I will start out with an oval. This will give me a basic frame for constructing my anchor, and it will also help me with one of the first challenges we are faced with in drawing an anchor, which is symmetri. If you’re struggling with drawing an oval take a look at my tutorial on drawing ovals, which you can find HERE.
Also, feel free to use a template if you need. And finally remember that your oval certainly doesn’t have to be as clean as the one you see below. I made this very clean in order to make this lesson as clear as possible.

Step 2
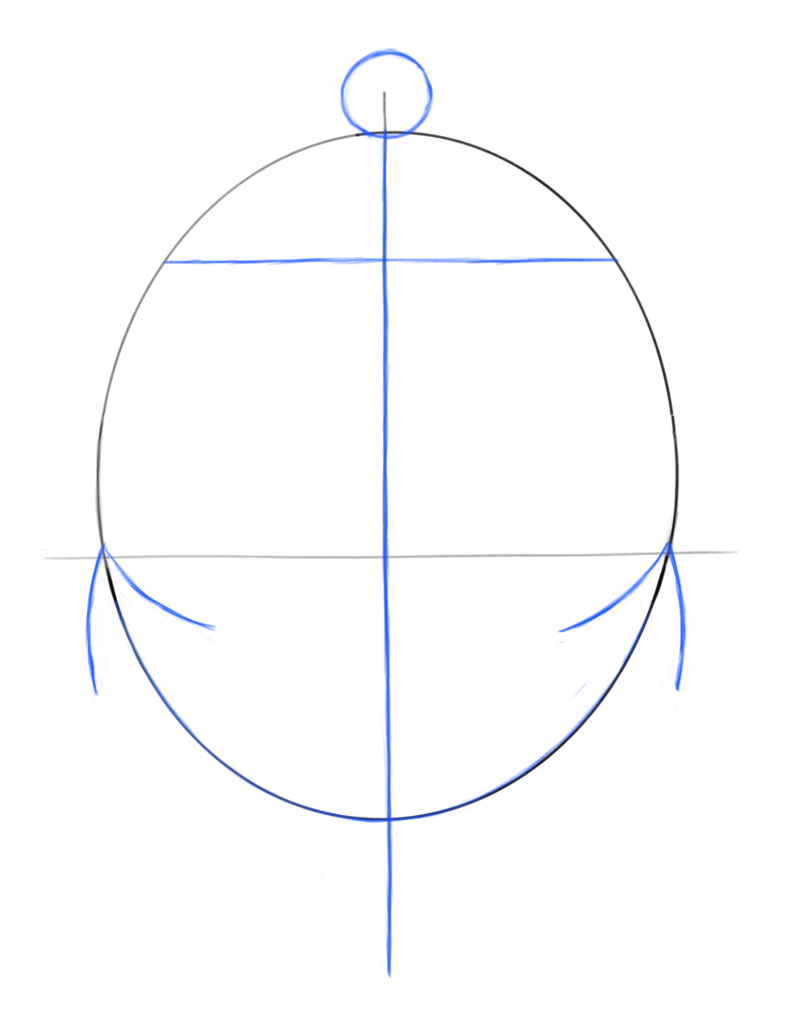
Once I have my oval, I am drawing an upside down cross over it (no religious symbolism here! Pure pragmatism! 😉 Here I am simply eyeballing the center for my vertical line and doing the same as I place my horizontal line a bit below the center.
Step 3
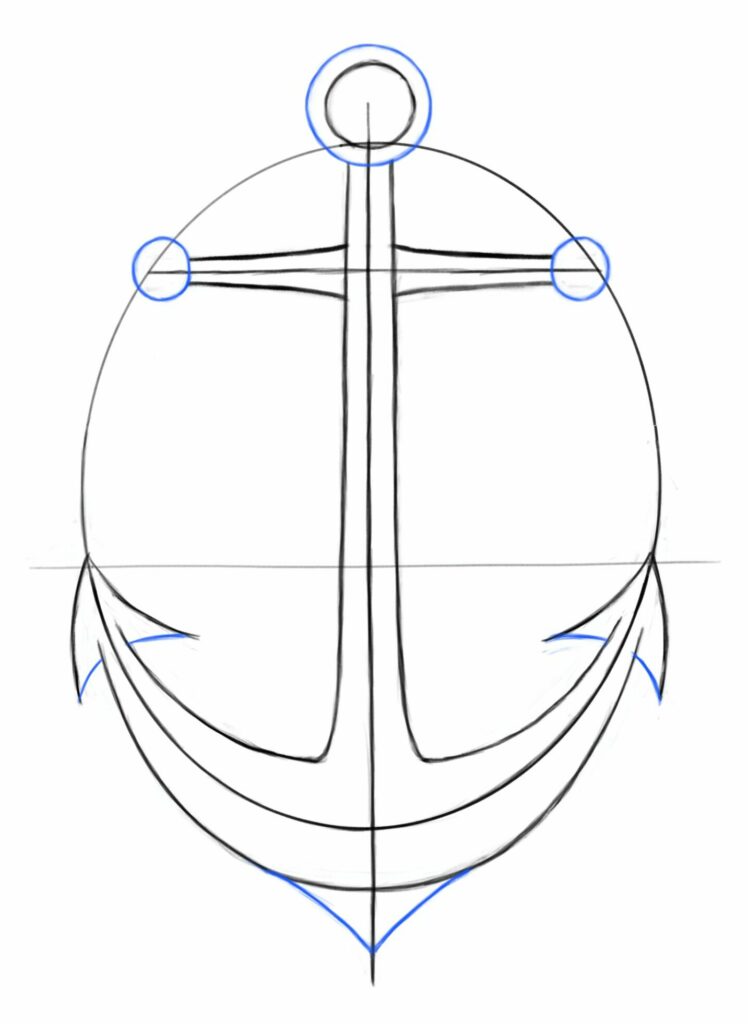
Using the oval and the cross, I am now drawing a really simple anchor shape. Basically your “Stickman-version” of an anchor. This will be my final guideline, and as you can see my oval and the cross going through it helps me tremendously with placing this guideline correctly, which hopefully will translate to a nice and symmetrical anchor in the end. (Notice that I continue the vertical line a good bit below the oval/rounded bottom of the anchor. This is fully on purpose, as I am going to use this line later on.)
 Step 4
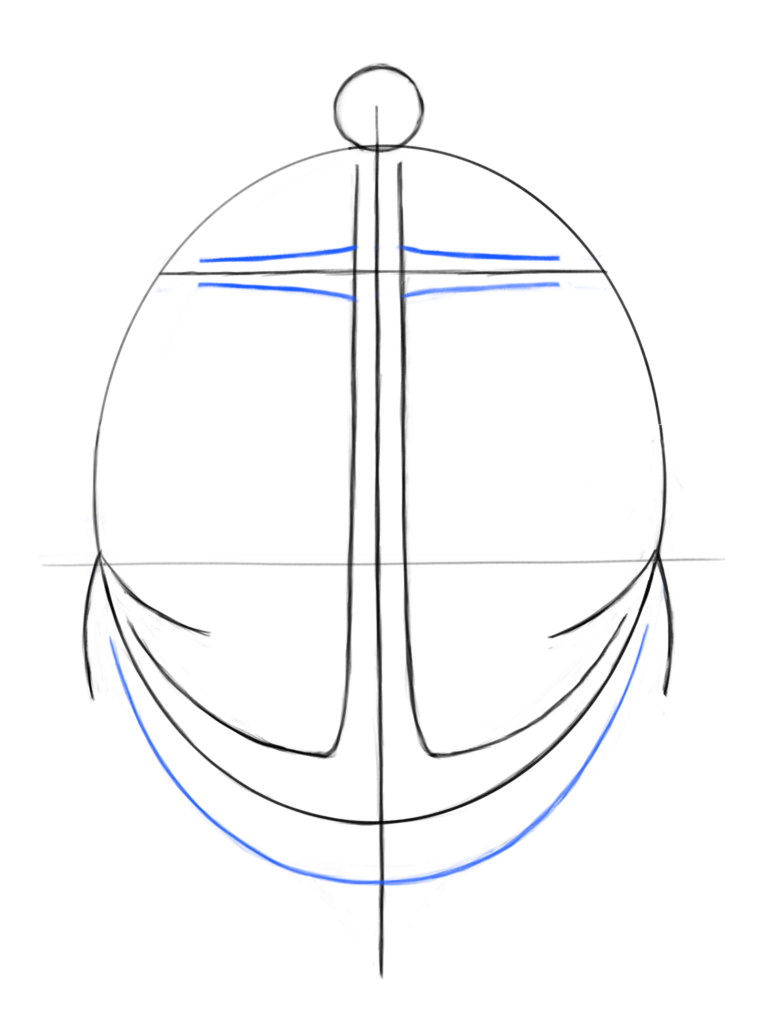
Using my “Stickman-anchor” – my guideline – I am now drawing the first part of the outline for my actual anchor. So just a little bit above my guideline.

Step 5
Again, using my guideline, I am adding to the outline of my anchor with the bottom edge and the vertical bar. Notice how I vary the distance from the guideline in order to shape my anchor in a more interesting way.
 Step 6
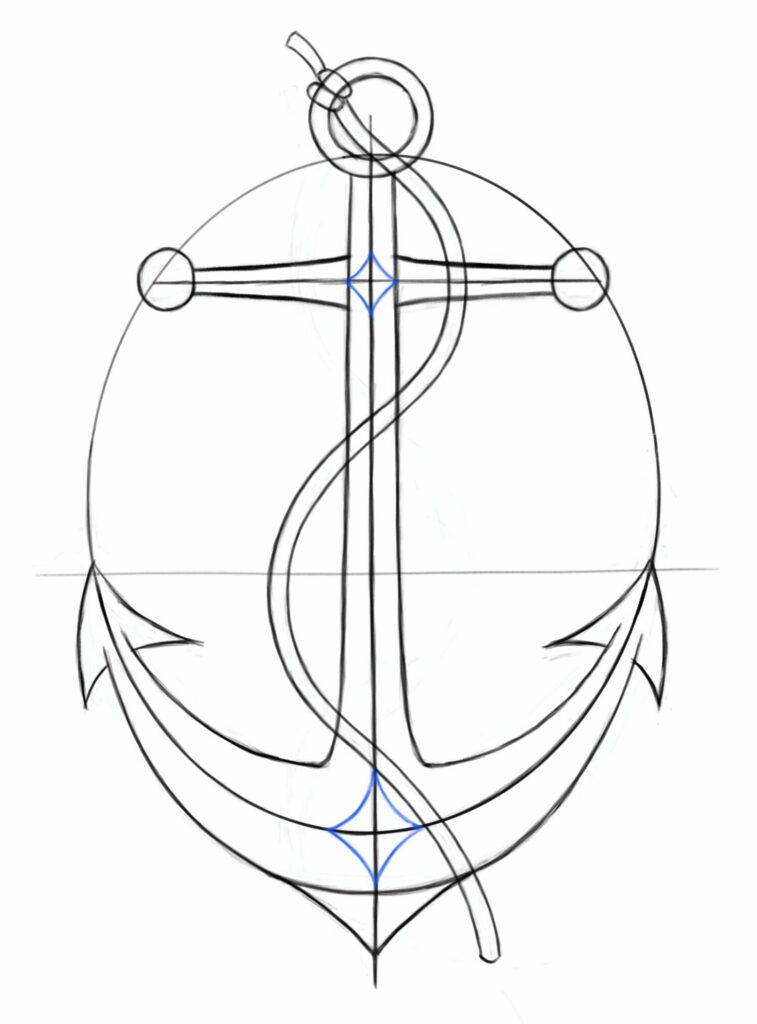
Finishing up the outline of my anchor with the final details a circle at the top, balls at the end of the upper vertical bar, completing the arrow shapes at the two points, and adding a pointy shape at the bottom (the reason for the aforementioned line going below initial guideline)
Step 7
This is really an optional part. I want to add a rope to the anchor to make my drawing a bit more interesting, so I am drawing the basic shape of it. You can totally leave this out if you wish (it will save you a few steps 🙂

Step 8
Another optional step. I am drawing these rhomboid shapes which I find will give a nice touch to the surface of the final anchor (feel free to scroll down and see what it looks like at the end, to determine if this is something you want to deal with or not… 😉
 Step 9
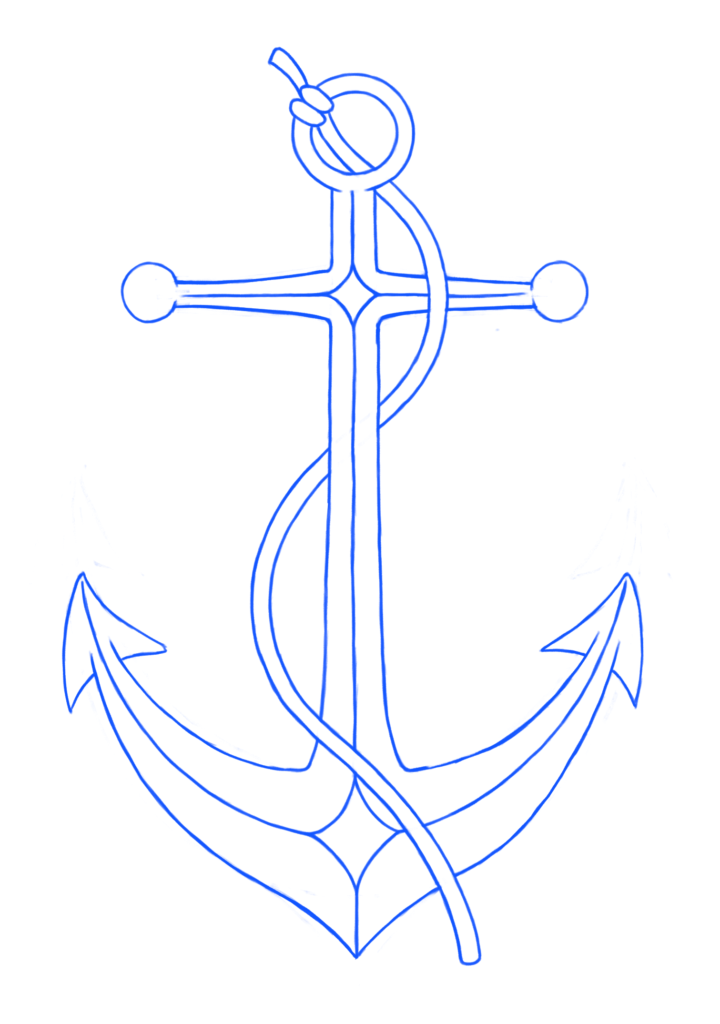
Eraser time!
Pulling out my trusty old eraser it’s time to clean up my sketch. I erase all lines that are not to be part of the final piece. So obviously the initial oval and the cross going through it, but also the lines between the different parts of the anchor to take it from a series of individual parts to one coherent piece (If this doesn’t make sense, you can compare steps 8 and 9 to see what I did).
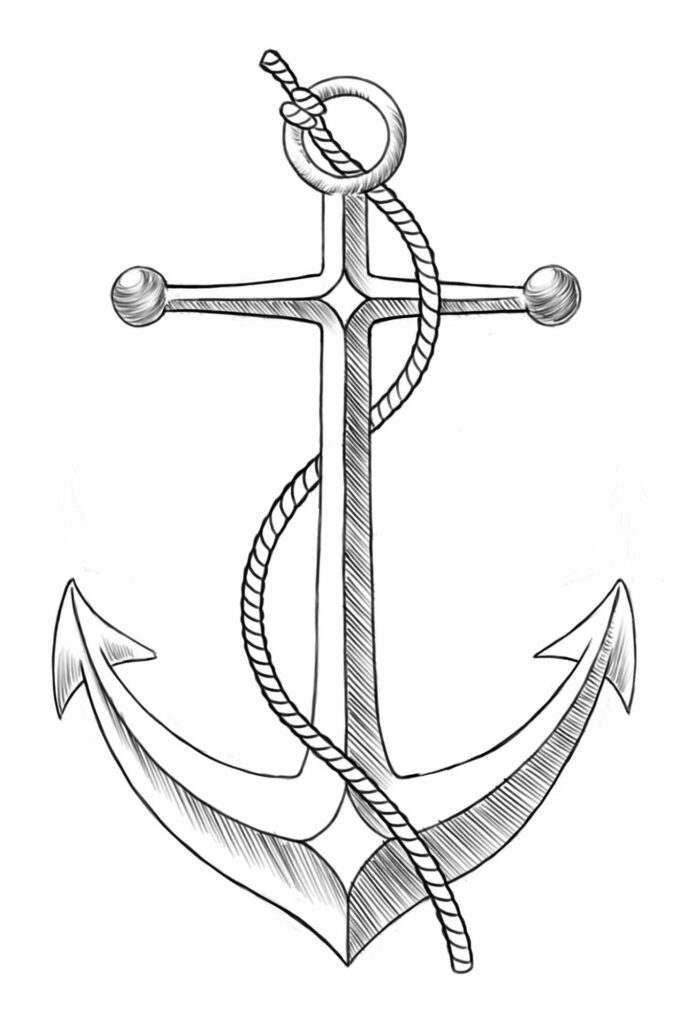
Notice the rope and how I alternated between erasing parts the rope, and parts of the anchor, to make it swirl around the anchor.
Step 10
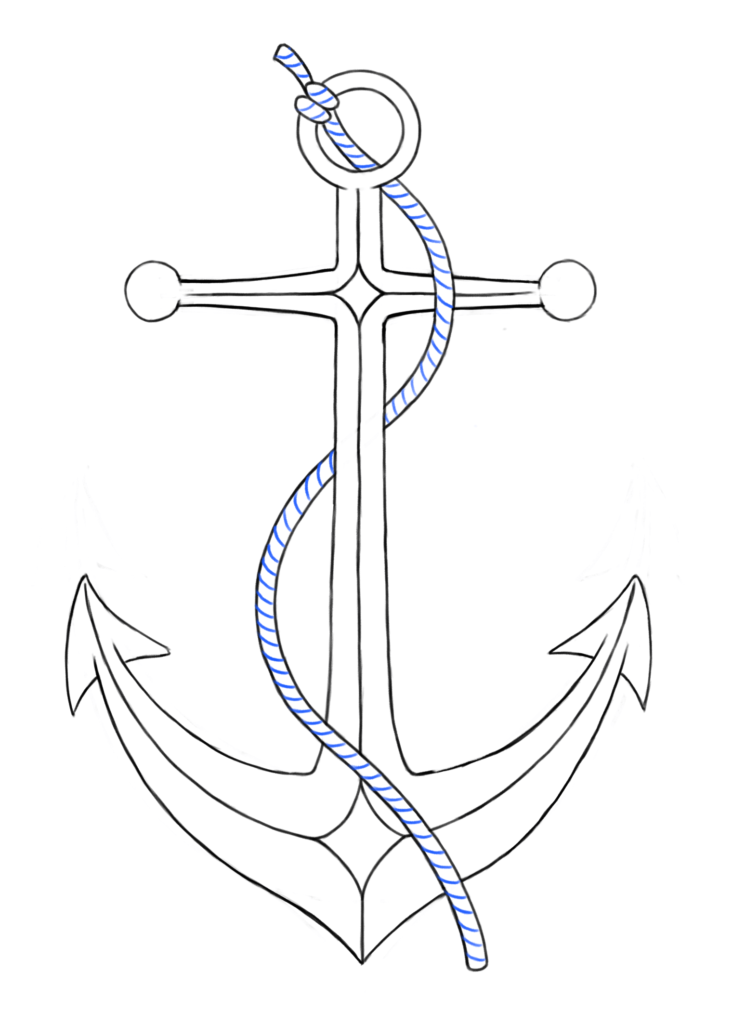
Now, that I have my finished outline, I want to make the rope look a little more realistic. So the first step to that is to draw small diagonal lines across the rope all the way down the length of the rope.
 Step 11
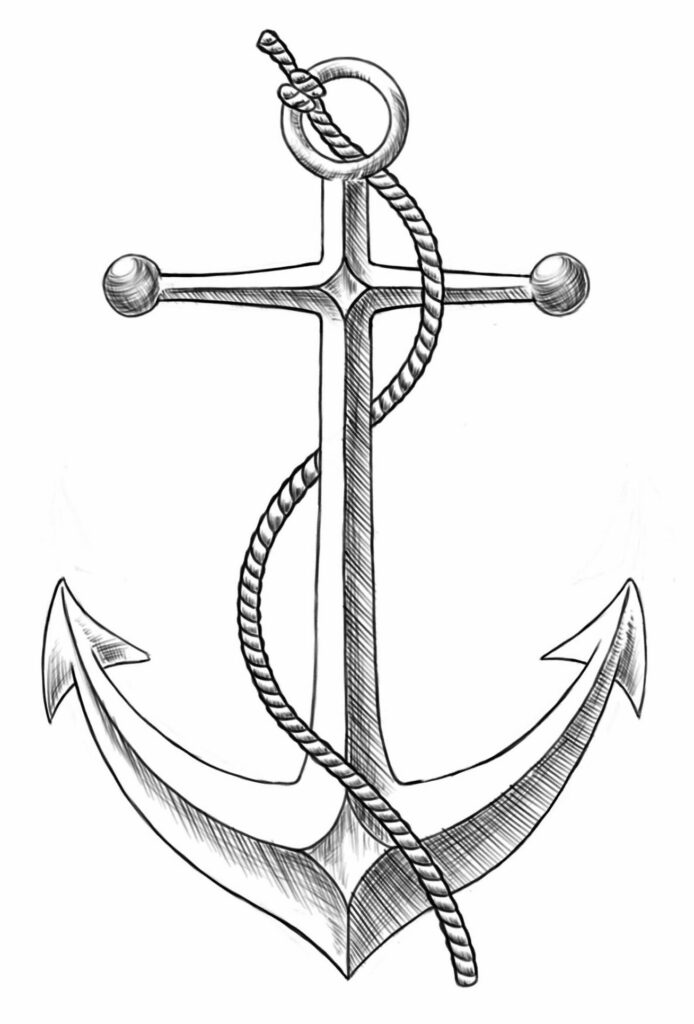
Next step of making my rope a bit more true-looking, is to make really small curvy shapes between each of the diagonal lines from before. (Notice how that really makes the rope come alive, a great example of the way small details can make a big difference. 😉
 Step 12
Again, we’re at an optional step. I am now colouring my anchor.
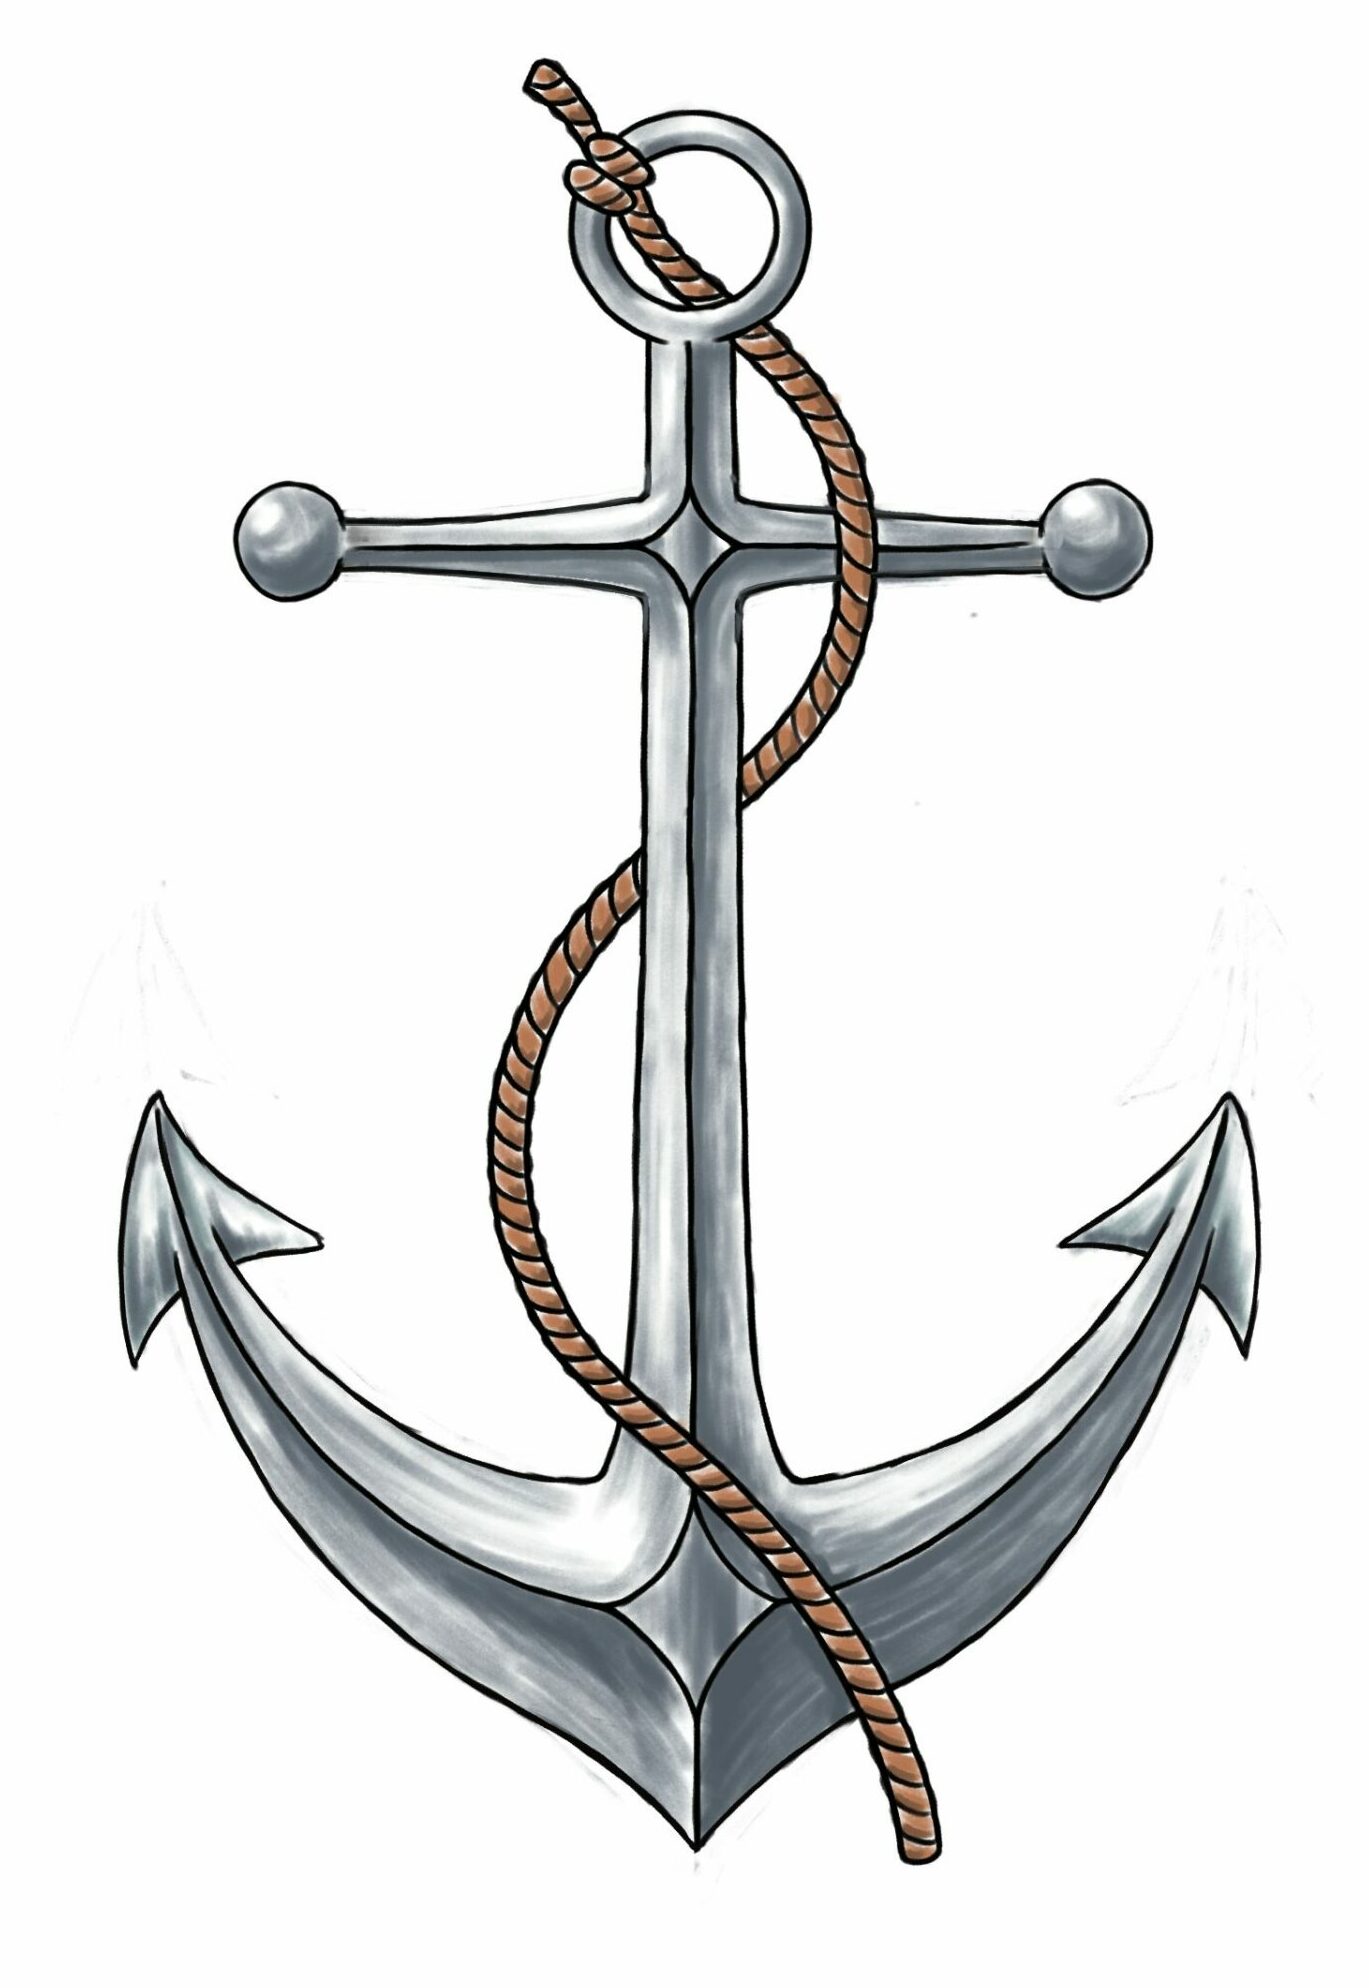
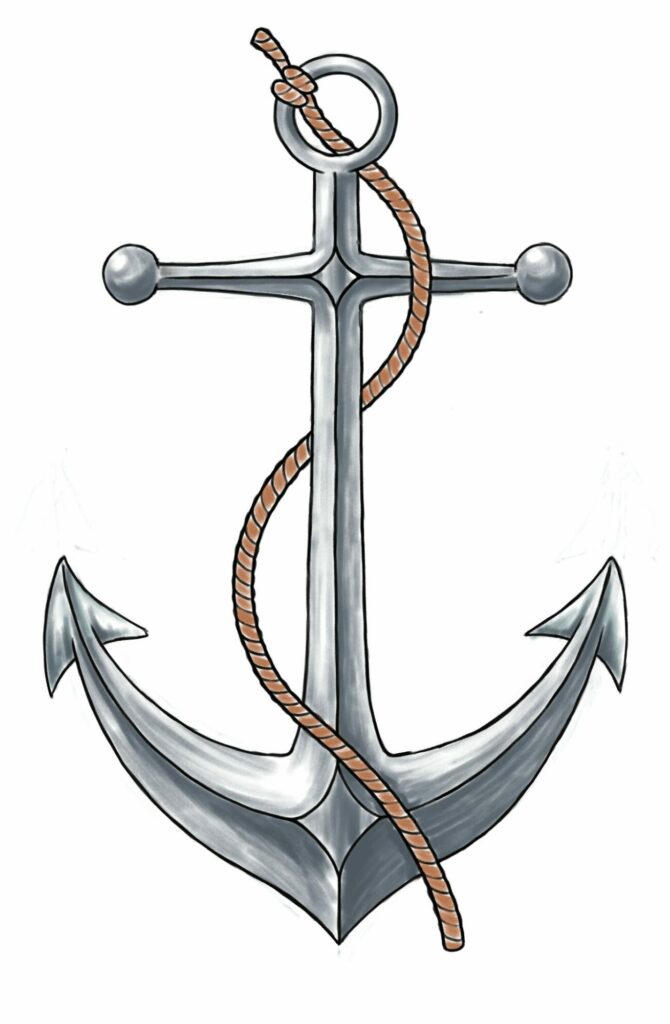
For this you will need two shades of grey, and two shades of brown. A light and a dark of each. And then take a look at the way I have applied the colouring here. I have started out with the two lighter shades of my two colours, and also leaving some much lighter areas to give the impression of light reflecting in the steel of the anchor. Same thing for the rope.
Whether the colouring is something you want to do, is obviously completely up to you. You can also opt for just leaving it as is for a really clean look (stop after Step 11), or you can shade it using just the fineliner and some crosshatching (scroll to step 12.A below, for an example of what that might look like).
 Step 13
To continue my colouring, I am now using the darker of the two colours. And I am continuing the pattern from before with the lighter areas, only applying dark colour to parts of the already coloured areas to emphasize the contrast between light and shadow.
Step 14
Now I am colouring the rope, so I am going to grab my brown markers. I’m basically following the same approach as in the previous two steps. Starting with the lighter of the two colours.
Step 15
And then following with the darker of my two browns to add a shading effect.
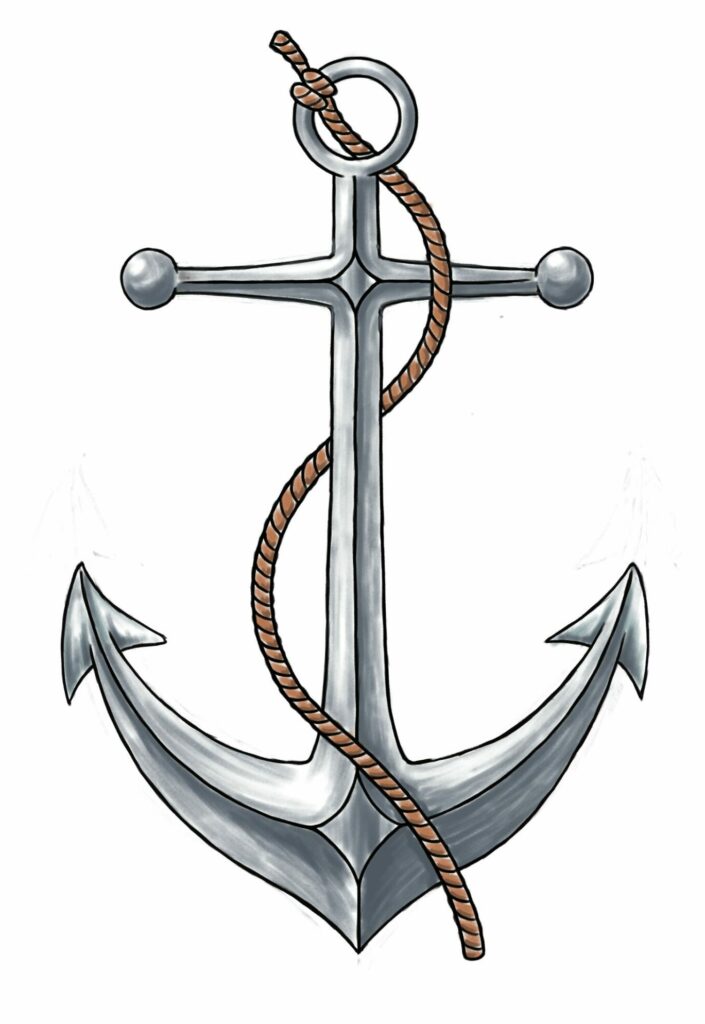
And there you have it.
That is the final anchor, complete with colouring.
Now, of course this is one way to draw an anchor. I have done my best to try and make the process straightforward, and to explain the steps and the reasoning behind some of the choices I have made along the way. I hope it makes sense. If not, or if you have any questions, or comments please go ahead and leave them below this post I will be happy to answer them.
Now as mentioned before, you can also decide to just go with a black and white edition, and just use some crosshatching, in which case you would skip steps 12 and 13 and jump to step 12.A (below) instead.
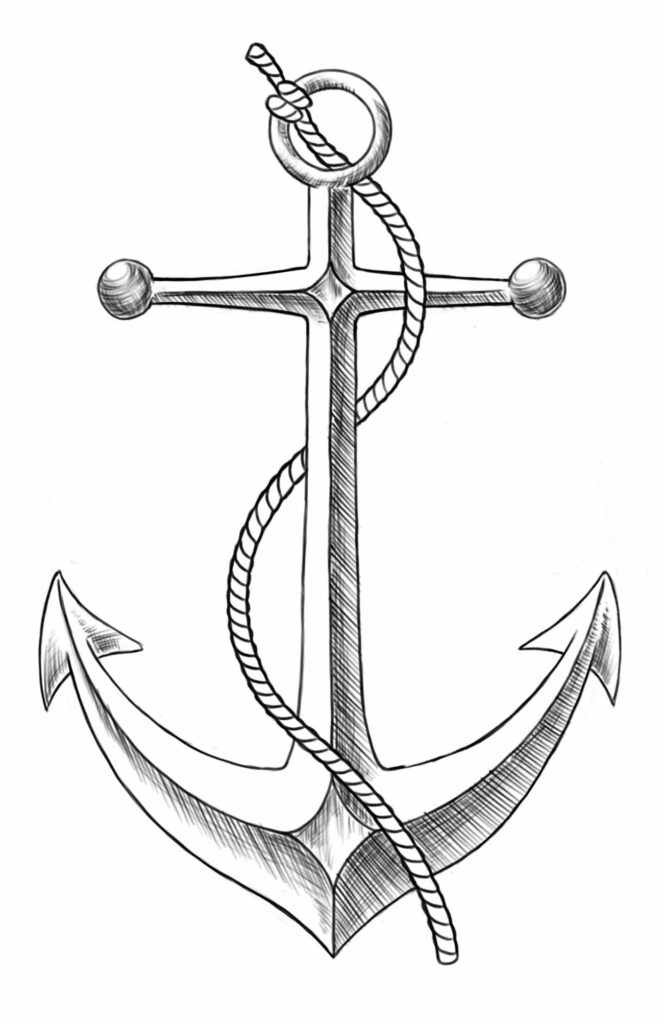
Black & White with Crosshatching
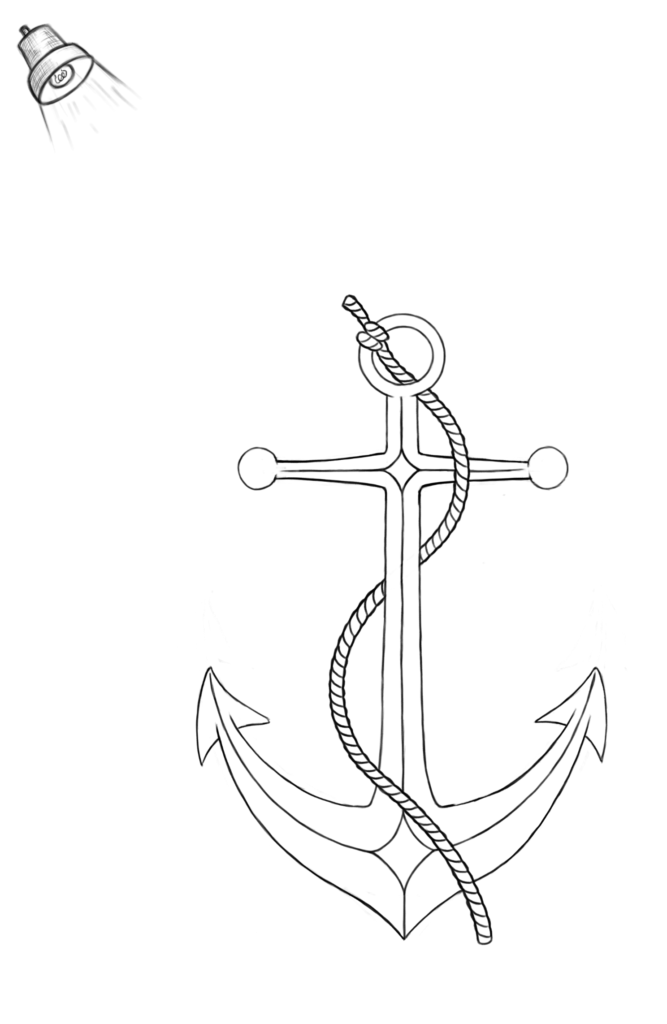
This is an example of what the anchor might look like, if we decided to just keep it in black and white, and do crosshatching in ink instead of colouring. A lot of my drawings are done exactly this way. I really like the aesthetic of this way of drawing.
If you pay attention to the way I have applied the crosshatching you can see that I have tried to follow the shape of the anchor, and I have imagined a lightsource coming from above and to the left. Hence the shading is the heaviest on parts that are behind a sharp edge on the right/lower sides of the main shapes.
Sometimes it helps to imagine an actual tiny lamp.
I might even draw it in like this:
Black & White Step 1
And keeping my lightsource in mind, I am then starting in with the black fineliner.
As you can see I am drawing on the opposite side and below where the light is coming from.
I am simply drawing small lines as the first step. And I am following the shapes of the anchor. So where the metal is smooth, the lines are smooth, and where the metal is rounded, so are the lines.
Black & White Step 2
Continuing on, I am doing a second pass with some more lines, this time going across the first set of lines. Hence the term CROSS-hatching 😉
On this second pass I am a little less heavy-handed, spreading the lines a little more.
Black & White Step 3
Finally I am doing the same thing on the rope. Though I am doing only one pass on the rope, as it is a much smaller area, and if I was to do two passes as before, I think it would be too dark.
And as promised…
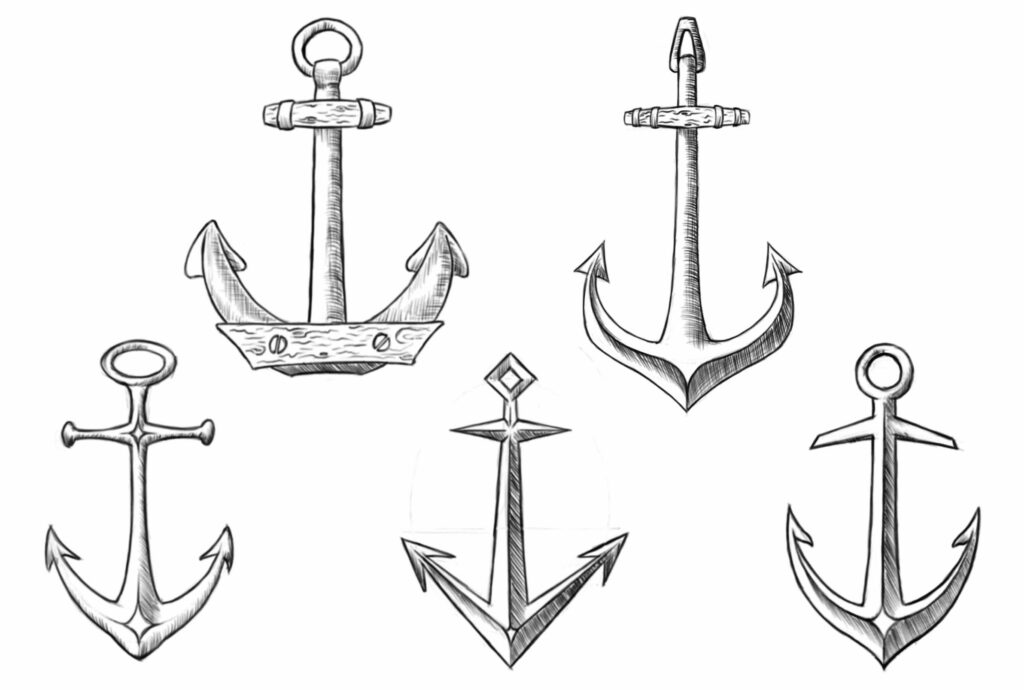
Here is a little inspiration to different variations on your ow anchors. These are all drawn using the same basic approach as outlined in this tutorial, only adding some variations on the different parts to end up with a different final shape in the end. You could try to copy these, you could try to add different parts of each one to come up with hybrid, or you can simply draw inspiration and make up your own final result.
And remember: Don’t overthink it, just play around with different things. Fill up a page of your sketchbook with sketches. The important part is to just draw! 🙂
And hey… If you get inspired by this post and you do try your hand at drawing this or any other anchor, I would love to see it. You can send it to michael@thedrawingjourney.com. (I promise I won’t show it to anybody else without your specific permission! 😉
And finally check back for a coming video tutorial on my YouTube channel The Drawing Journey.
Hi Michael,
Thank you for sharing such an informative article on drawing an anchor, and for your very interesting website.
I have been drawing since I was a kid as my older brother is an amazing artist, but he didn’t pursue it enough to make it his living.
I am going to share this article with my nephew who also loves art and I believe he will be able to learn lots from you. I will encourage him to look deeply into this site and see what new skills he can learn.
If he has any questions or isues then I will tell him to get in touch with you, if that is OK?
Thank you for sharing and keep up the great work.
All the best,
Tom
Hi Tom,
So happy to hear that you and your brother are among the few who never gave up drawing. Personally I found the passion again after taking a long break, and I’m so happy I got back to it. It’s a fantastic activity! 🙂
Please, by all means, go ahead and share the site with your nephew! I would be thrilled to be able to grant a little bit of inspiration to his drawing journey! 🙂 And of course he is more than welcome to contact me with any questions. He can write me an email on michael@thedrawingjourney.com, or he can just leave a comment on any of the posts on the site, and I will answer him there. Whichever option he prefers! 🙂
Thanks for the visit and thanks for the kind words!
All the best,
Michael
Haven’t done a lot of drawing for quite some time, but your article and diagrams have brought back some inspiration. You have detailed it out so simply and precisely that it is a doable process for anyone. Thanks for the info. Much appreciated.
Hi Joseph,
Well, as you know, it’s never too late to start/restart something new. Unfamiliar things, and learning new skills, are a fantastic way to keep us mentally sharp as we mover through life. I’m glad I was able to bring back some inspiration. Let me know if it amounts to some actual drawing. 🙂 Thanks for the visit, and thanks for the kind words.
All the best,
Michael
Hello Michael, I think you must have been a great painter with such experience in parting, thanks so much for your sharing of drawing skills, I also loved drawing as a child, but I didn’t continue to learn, and my son also loves drawing, it is a good idea to develop such a skill, any passion can inspire power to do wonders, your website is very interesting. if you can add some interesting videos to it, I think it will get more traffic, we can inquiry learning how to get more traffic from YouTube, and I am now learning how to use AI to make more videos to upload on Youtube, I did learn some tips to get more views and followers on Youtube, but need more interesting videos, I am weak in making videos, so it is your advantages to make visual element that followers will love.
Hello Yang. Thank you so much for your kind words. Actually painting is something that I’m hoping to get into more over time, but for now it’s just drawing for me. 😉 I think most of us draw a lot as kids, and then we give it up. I actually did as well. I just picked it up again many years later, which was actually the start of The Drawing Journey. I wanted to make something to keep myself accountable. 😉
I do actually have a YouTube channel. You can find it right HERE It’ doesn’t have that much content yet, though. I am working on a video for this Anchor drawing lesson at the moment. It should be up soon, but everything takes time, right? I 🙂
Anyway, thanks again for the visit, and for the comment. I appreciate it.
All the best,
Michael
Hey Michael, I love this post! It’s easy to follow and very informative, and you show a super way to draw something that looks hard, but quite simple to do!
Your expertise is demoed and can offer many viewers some excellent pointers!
With todays techno stuff, laptops, smartphones, and writing tools that are availble to aid us in creative drawing, we have kind of lost touch to be organic and simply use our hand and pencil!
I say we need to go back to basics and learn how to draw, that in its self is a technique that can be learnt, and your site can definately offer that!
I sneakily roamed around your website and came across ‘drawing from the shoulder’ how amazingly you can draw perfect circles, just by working with the shoulder in a loose way. I never thought of it in that way, now I can focus how and in what way I draw!
Thank you for this opportunity to observe your amazing talent and continue to share your wonderful techniques!
I will follow your work on YouTube, and maybe get some pointers, to use in my Art club at school!
Julia. ? ?
Hi Julia,
Thank you so much for the kind words, and thank you the comment. 🙂
I really appreciate your point about the importance of doing things organically! This is such an important point, that I will definitely be diving into more in future posts. Also with the rise of AI-art, I feel it’s becoming more and more important.
More creativity into the world please!!!
I’m so glad that you found some time to roam around the site, and found some helpful stuff. Yeah, drawing from the shoulder really is a useful technique! And PLEASE take all the inspiration you can and need for your Art club at school! If I am in any way shape or form able to help something like that grow and blossom, then I will say mission accomplished! 🙂
Thanks again for the visit, and thanks for the comment.
All the best,
Michael
Hi Michael,
Wow! You really are a master of your craft. I thoroughly enjoyed learning how to draw an anchor and will be sharing this with my grandson as he is mad about drawing and especially using all the shading techniques. You have given so much details and this will make it easier for him to follow. My grandson also purchased that graphgear pencil for drawing. It is is absolute favourite.
All the best,
Jill
Hi Jill,
Thank you so much for your kind words. I’m glad you enjoyed the learning, and that you will share this with another one with the passion for drawing.
And yes, the Graphgear pencil is fantastic!
Thanks a lot for the visit, and for the comment. 🙂
Hello Michael!
I wish there were more teachers like you explaining how to draw something step by step haha! So wonderful to see that basically anyone now can draw a beautiful anchor.
Even as a kid, I have always been quite able to draw something from a picture, but never something just out of my head like that, and I would like to learn that now, thinking more in dimensions, right?
I love peoples creative minds like this thanks so much for the tutorial!
Lizzy
Hi Lizzy!
Thank you so much for your kind words! I’m so happy that you found this helpful. Yes, most of us were able to draw when we were kids, but then so many of us stop playing and start doing adult stuff, which unfortunately seldom involves drawing. But finding the interest again, is -as you know – the first step. 😉 Thanks for the visit, and thanks for the comment! 🙂
All the best!